Butter Late Than Never: Don’t chicken out
A cooking series for college students with toddler-level culinary skills

More stories from Rachel Ayotte
This story is the second installment of “Butter Late Than Never,” a series where Rachel Ayotte explores cooking as a college student.
Last week, I invited my little brother over for dinner to test out my newfound culinary skills. Since successfully baking a birthday cake, I’ve been feeling pretty good about this whole cooking thing.
However, jumping to cooking with raw meat was not exactly the same as blindly following Betty Crocker.
My little brother was the perfect victim to try an easy chicken dish I saw on Buzzfeed Tasty. He was skeptical at first and repeatedly told my roommates that he was a little worried to eat the meal I had prepared, but I proved him wrong. He ate his words, admitting that it came out “decent” and was “pretty good.” I sent my mom a picture of him eating my dinner and she was impressed that he didn’t look entirely disgusted or ill.
I’ll take this as a victory — Rachel: 1, Salmonella: 0.
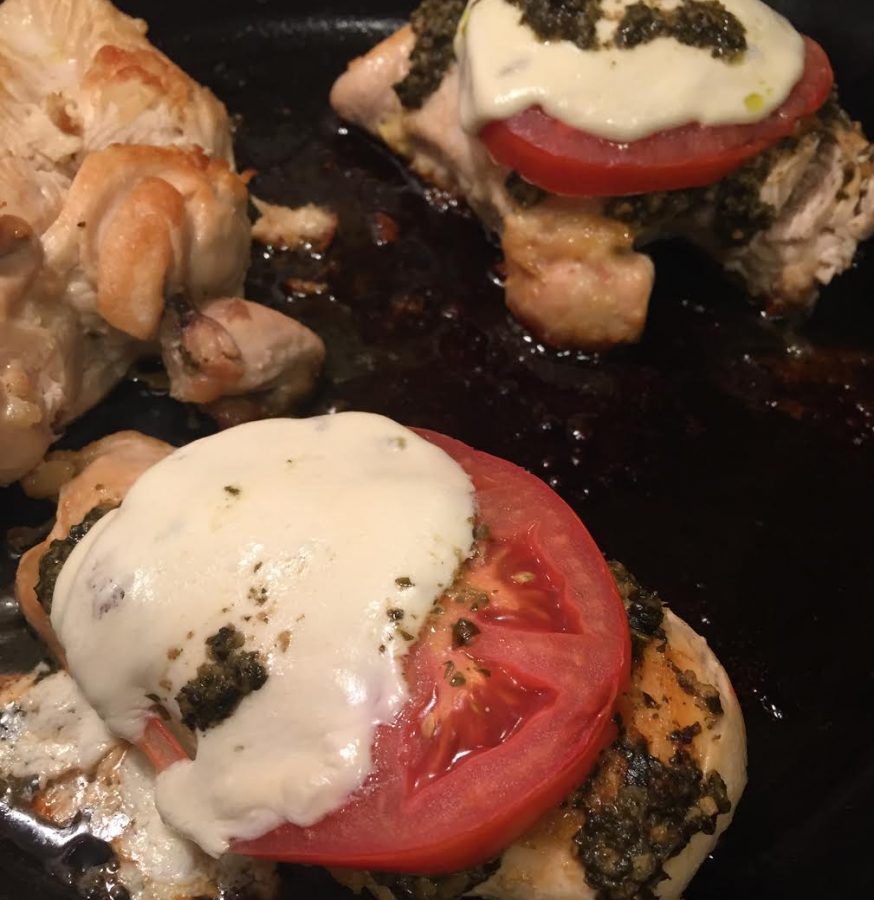
This dish is extremely easy to make and only takes about 45 minutes. The greatest part about this meal is that it has the appearance of being fancy. In reality, it is melted cheese on chicken.
C’mon, who doesn’t love that?
What you will need:
- Skinless or boneless chicken breasts
- A baking pan, any size (easily found at the grocery store)
- A jar of basil pesto (any type or brand is fine)
- Tomatoes
- Mozzarella cheese (shredded or ball — whatever you prefer)
Step 1: Preheat and lay out each chicken breast
Preheat your oven to 400 degrees and lay the chicken breasts on the baking pan.
Step 2: Dress that chicken up
Take a knife, or any utensil for that matter, and spread the basil pesto over each breast — as much or as little as you’d like. I suggest applying a hearty amount because, uh, basil pesto is tasty AF.
Next, slice the tomato and lay each slice on top of the pesto. Cut up the mozzarella and lay those slices on top of the tomatoes. If you are using shredded mozzarella, sprinkle the cheese on top.
The amount of cheese is at your discretion, but let it be known that there is no such thing as too much cheese.
Step 3: Bake, bake, bake
Throw each flavor-packed chicken breast in the oven for 40 minutes.
Step 4: Put your company at ease
While you’re waiting for the chicken to cook, convince your dinner guest you know exactly what you’re doing, at least for the most part.
Practice makes perfect, right?
Step 5: Serve your masterpiece
Cut into the chicken before plating it to ensure that it’s completely cooked. I was beyond paranoid that I was going to poison my little brother so I went a little overboard with this.
Once you’ve checked out and mangled each piece like I did, be sure to watch the shocked expressions on your guest’s faces. Not only did you serve them a “real adult meal,” but they will live to tell the tale.
Note: For any advanced cooks out there, I would definitely suggest searing the chicken in a cast iron pan with olive oil before baking it (cheap cast iron pans go for around $20). When I told my mother I was attempting this recipe, she suggested searing before baking to add flavor.
So if you have some cooking chops, go for it. Sear that chicken. Why are you reading this toddler cooking hogwash anyways?
But if you’re like me, just stick with the oven and hope for the best.
Email Rachel at [email protected] or follow her on Twitter @RachelEAyotte.